Connecting power to motherboard is a crucial step in PC building. This process, while seemingly simple, holds significant importance for the overall performance and stability of your computer system. In this guide, we will walk you through the entire process, ensuring you can confidently and correctly power your motherboard.
Table of Contents
Understanding the Basics
What is a Motherboard?

A motherboard, often referred to as a mainboard or mobo, is the primary circuit board inside your computer. It’s essentially the nervous system of your PC, providing the electrical pathways that allow data to flow between the various components. These components include the central processing unit (CPU), memory (RAM), storage devices (like hard drives or SSDs), and peripherals (like your keyboard and mouse).
The motherboard also houses various slots for expansion cards (such as graphics cards), interfaces for hard drives (like SATA or M.2 slots), and connectors for external devices (like USB ports). It’s the hub where all of your computer’s components meet and interact, making it a critical part of any PC build.
The Role of a Motherboard in a PC
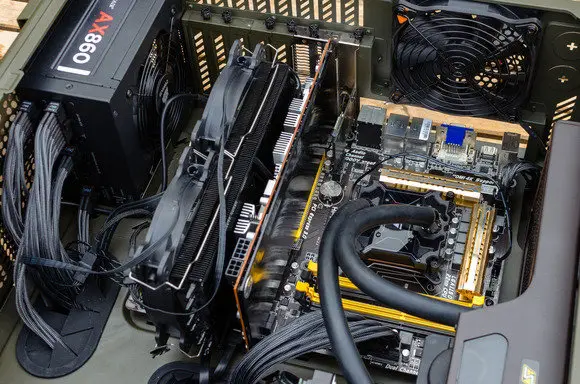
The motherboard’s role in a PC is multifaceted. It’s responsible for allowing all the components of your PC to receive power and communicate with each other. This communication happens over pathways known as ‘buses’. The speed at which data can travel these buses can have a significant impact on your computer’s performance.
The motherboard also contains your computer’s BIOS (Basic Input/Output System), which controls the most basic functions of your PC and initiates the startup process when you turn the computer on.
Importance of Correctly Connecting Power to Motherboard
Connecting power to the motherboard correctly is crucial for several reasons. Firstly, without power, the motherboard and, by extension, the rest of your computer’s components, simply won’t work. But it’s not just about making sure everything is powered. How you connect power to the motherboard can affect the stability and longevity of your entire system.
Incorrectly connected power can lead to issues like system instability, component damage, or even electrical fires. For instance, if the CPU power connector is not plugged in, the system may fail to boot, or if the power connectors are forced into slots where they don’t belong, it could result in permanent damage to the motherboard.
The Importance of Correct Power Connection in Mining
In the context of mining, whether it’s cryptocurrency like Radiant or EthereumPOW, or data mining, the importance of correctly connecting power to motherboard is amplified. Mining rigs often run at full capacity for extended periods, which puts a significant amount of stress on the components. Any instability in the power supply could lead to system crashes, data loss, or hardware failure.
Moreover, mining rigs often consist of multiple high-performance components, such as several graphics cards, which require a stable and substantial power supply. Therefore, ensuring that the power is correctly and efficiently distributed across the motherboard is crucial for the smooth and profitable operation of a mining rig.
Preparation Steps
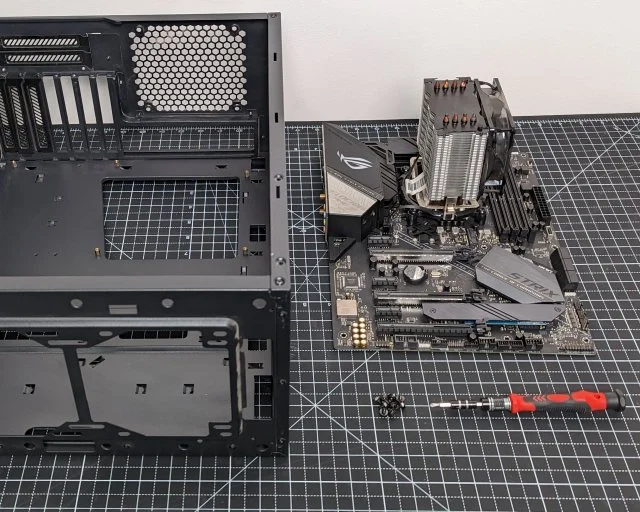
Before you dive into the process of connecting power to motherboard, it’s essential to prepare adequately. This preparation involves gathering the necessary tools, understanding the safety precautions, and familiarizing yourself with the components involved.
Tools Needed
To connect power to the motherboard, you’ll need a few basic tools:
- Power Supply Unit (PSU): This is the component that will provide power to your motherboard and other components. Make sure it has enough wattage to support all your components, especially in a high-performance or mining setup.
- Screwdriver: A Phillips-head screwdriver is typically used in PC building. This will be used to secure the power supply unit to the case and may be needed for other steps in the building process.
- Anti-static wrist strap: This is a safety device that prevents static electricity from damaging the sensitive electronic components in your PC. It’s especially important in dry environments where static electricity is more common.
- Motherboard manual: This will provide specific instructions and diagrams for your particular motherboard, including where the power connectors are located.
Safety Precautions
Working with electronic components requires some basic safety precautions to protect both you and your PC components:
- Use an anti-static wrist strap: As mentioned earlier, static electricity can damage electronic components. Always wear an anti-static wrist strap and attach it to a grounded object to prevent static damage.
- Work in a clean, well-lit environment: This will help you see what you’re doing and prevent dust or debris from getting into your PC components.
- Don’t force components: If a power connector or other component doesn’t fit easily, don’t force it. Double-check that you’re trying to insert it in the correct orientation and that it’s the right connector.
- Keep components on anti-static surfaces: When you’re not working with them, keep your components on anti-static surfaces. Many components come in anti-static bags, which are perfect for this.
Understanding Your Components
Before you start connecting power to motherboard, take some time to familiarize yourself with the components. Identify the power connectors on the motherboard and the corresponding cables on the power supply. Your motherboard manual will be a valuable resource for this.
In conclusion, proper preparation is key to successfully connecting power to the motherboard. By gathering the right tools, following safety precautions, and understanding your components, you’ll be well-equipped to power your motherboard and bring your PC to life.
Identifying the Power Connectors

Before you can connect power to motherboard, you need to identify the power connectors. These connectors are where the power supply unit (PSU) cables plug into the motherboard, providing the necessary power for the motherboard and its connected components to function.
Power Connectors on Motherboard
There are several different motherboard power connectors:
24-pin Main Power Connector
The 24-pin main power connector is a crucial component on a motherboard that supplies power to most of the motherboard’s circuits. It’s typically the largest connector on the motherboard and is designed to be connected to the 24-pin power cable from the power supply unit (PSU).
The 24-pin connector is responsible for delivering power to the various components and circuits on the motherboard, including the chipset, expansion slots (like PCIe slots), and peripheral interfaces (like USB and SATA ports).
The connector itself consists of 24 pins, each carrying a different type of electrical power needed by the motherboard. These include several +3.3V, +5V, and +12V power lines, as well as ground lines and a power-on signal line that allows the motherboard to control the power state of the PSU.
8-pin CPU Power Connector
The 8-pin CPU power connector, also known as the EPS12V connector, is a vital component on a motherboard that supplies power specifically to the CPU. It’s typically located near the CPU socket on the motherboard and is designed to be connected to an 8-pin power cable from the power supply unit (PSU).
This dedicated power supply is crucial because the CPU is one of the most power-demanding components in a PC or mining rig.
The connector itself consists of 8 pins, with four pins providing +12V power and the other four providing ground. This +12V power is used by the CPU to perform its operations.
PCIe Power Connectors
These connectors provide power to the PCIe slots, which are used for components like graphics cards. They are typically 6 or 8-pin connectors.
SATA Power Connectors
Serial ATA (SATA) power connectors are used to supply power to SATA devices such as hard drives, solid-state drives (SSDs), and optical drives. These connectors are typically found on the power supply unit (PSU) cables and are designed to fit into corresponding connectors on the SATA devices.
SATA power connectors consist of 15 pins arranged in three rows of five and are larger than the data connectors on SATA devices. Each pin carries a different type of power or signal:
- Three pins carry +3.3V power
- Three pins carry +5V power
- Three pins carry +12V power
- The remaining six pins are used for grounding and other functions such as staggered spin-up and active indicator.
The +3.3V, +5V, and +12V power lines are used to power different components within the SATA device, allowing it to operate correctly.
Power Connectors on Mining Motherboards
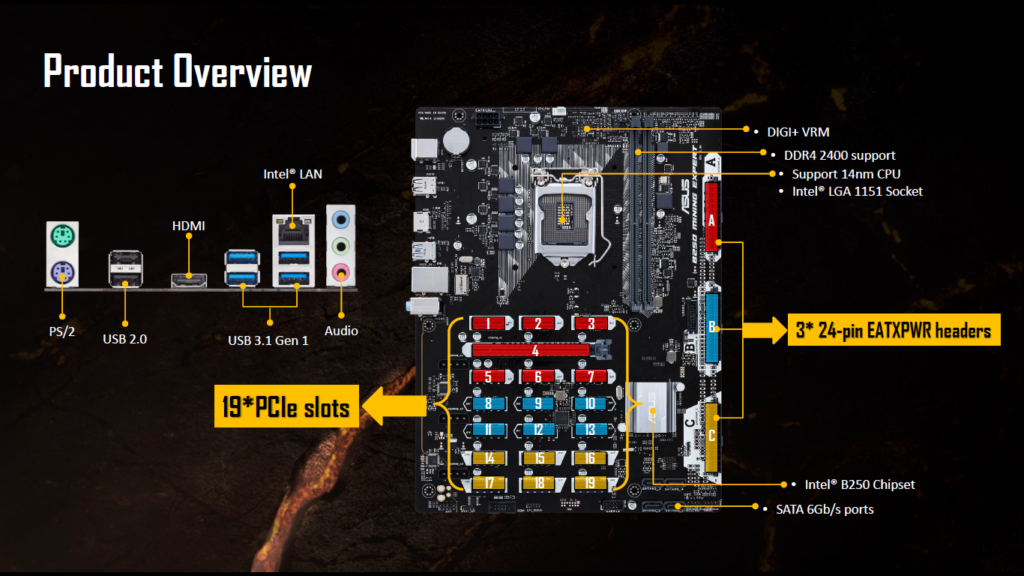
Mining motherboards often have additional power connectors, especially for the PCIe slots. This is because mining rigs typically use multiple graphics cards, each of which requires its own power connection. These additional power connectors ensure that each graphics card gets the power it needs to operate efficiently.
It’s important to note that not all power connectors on a mining motherboard need to be connected at all times. The number of power connectors you’ll need to use will depend on the number of graphics cards or other power-demanding components you’re using in your mining rig.
Correctly identifying the power connectors on your motherboard is a crucial step in connecting power to the motherboard. It ensures that each component gets the power it needs and helps prevent potential damage caused by connecting power cables to the wrong places.
Connecting the Power Supply to Motherboard
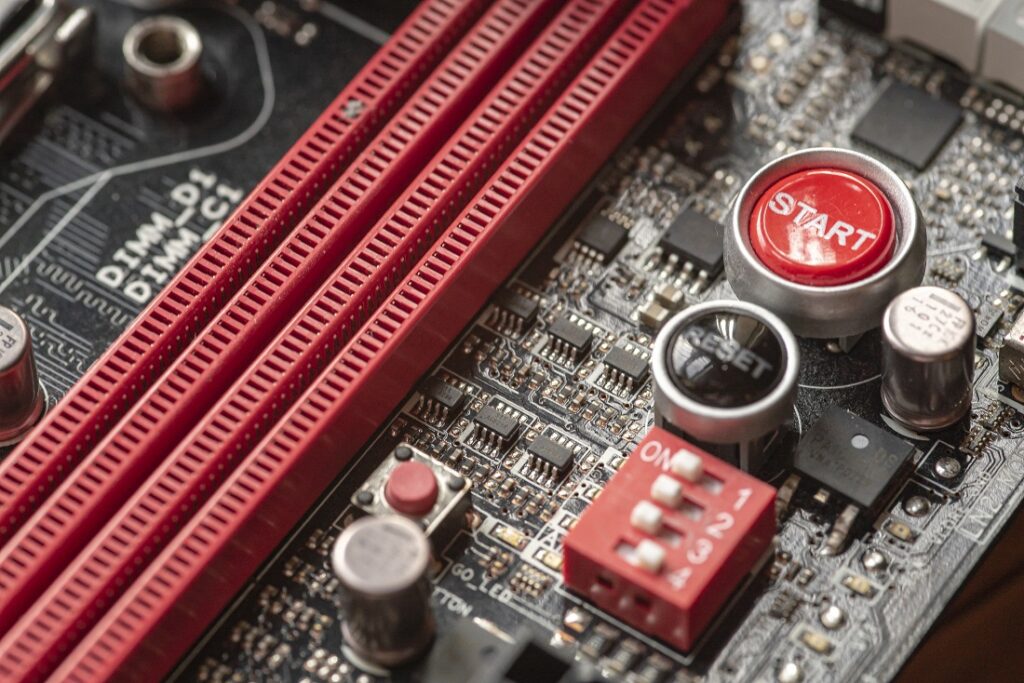
Once you’ve identified the power connectors on your motherboard, the next step is to connect the power supply to the motherboard. This process involves plugging the power cables from the power supply unit (PSU) into the corresponding connectors on the motherboard.
Step-by-Step Guide to Connecting Power
Here’s a step-by-step guide on how to connect the power supply to the motherboard:
- Connect the 24-pin power cable: Locate the 24-pin connector on the motherboard. This is usually on the right side of the motherboard. Take the 24-pin power cable from the PSU and plug it into this connector. Make sure the clip on the side of the connector snaps into place, indicating a secure connection.
- Connect the 8-pin CPU power cable: Find the 8-pin CPU power connector, usually located near the CPU socket on the motherboard. Connect the 8-pin power cable from the PSU to this connector. Again, ensure the clip snaps into place.
- Connect the PCIe power cables: If you’re installing graphics cards, you’ll need to connect power to the PCIe slots. These slots typically require 6 or 8-pin power connectors. Connect the corresponding power cables from the PSU to these connectors on the graphics cards.
Connecting Power on Mining Motherboards
When connecting power to a mining motherboard, you’ll likely have additional power connections to make. Mining motherboards often have more PCIe slots to accommodate multiple graphics cards, each of which needs its own power connection.
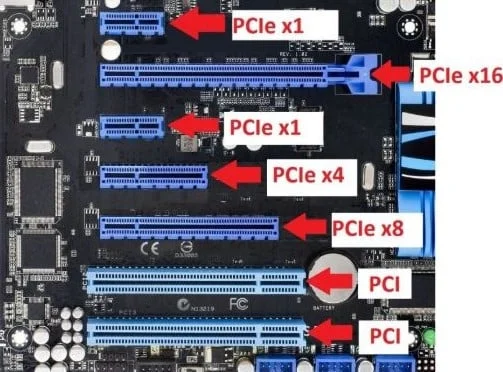
In addition to the 24-pin and 8-pin power connections, you’ll need to connect power to each of the PCIe slots you’re using. Some mining motherboards (like Asrock) also have extra 4-pin Molex connectors or 6-pin PCIe power connectors to provide additional power to the PCIe slots. If your motherboard has these, connect the corresponding power cables from the PSU to these connectors.
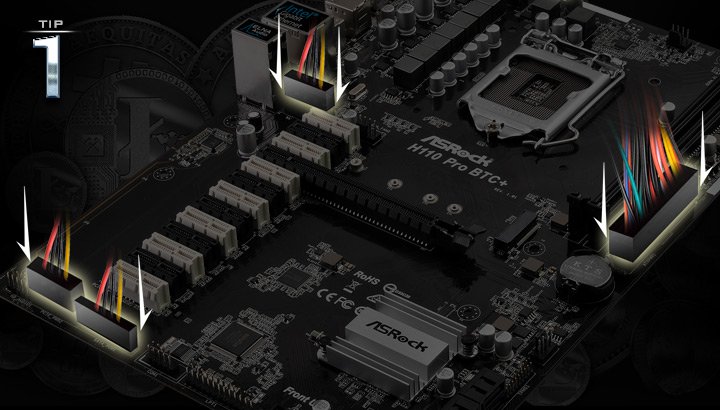
Remember, each power-demanding component in your mining rig, such as a graphics card, needs its own power connection. Make sure your PSU has enough power cables and wattage to support all your components.
Connecting the power supply to the motherboard is a crucial step in building a PC or setting up a mining rig. By following these steps, you can ensure that your motherboard and all connected components receive the necessary power to operate efficiently and effectively.
Troubleshooting Common Issues
Even with careful preparation and following the correct steps, you might encounter some issues when connecting power to motherboard. Here are some common problems and their solutions:
Common Problems and Solutions
- Problem: The PC doesn’t power on.
- Solution: Check all power connections. Ensure the PSU is switched on and plugged into a power outlet. Also, make sure the power button on the case is correctly connected to the motherboard.
- Problem: The PC powers on but doesn’t boot.
- Solution: Check the CPU and RAM installation. Ensure all components are correctly seated. Also, check the power connections to the motherboard and other components.
- Problem: The PC shuts down or restarts unexpectedly.
- Solution: This could be a sign of a power issue. Check that your PSU has enough wattage to support all your components. Also, ensure all power connections are secure.
Common Issues in Mining Rig Power Setup
When setting up a mining rig, you might encounter additional power-related issues due to the high-performance nature of these systems:
- Problem: The mining rig powers on but the graphics cards are not detected.
- Solution: Check the power connections to each graphics card. Each card should have its own power connection from the PSU. Also, ensure the cards are correctly seated in their PCIe slots.
- Problem: The mining rig shuts down or restarts during mining.
- Solution: This could be due to insufficient power. Mining, especially cryptocurrency mining, is a power-intensive task. Make sure your PSU has enough wattage to support all your components, including multiple graphics cards. Also, check the power connections to the motherboard and each graphics card.
- Problem: The mining rig runs for a while but then some graphics cards stop working.
- Solution: This could be a sign of overheating, which can be caused by insufficient power. Check the cooling system of your rig and ensure all fans are working properly. Also, check the power connections to each graphics card.
Troubleshooting is an essential skill in PC building and setting up a mining rig. By understanding the common issues and their solutions, you can quickly diagnose and fix any problems that arise, ensuring your system runs smoothly and efficiently.
Conclusion
Connecting power to motherboard is a critical step in building a PC or setting up a mining rig. It’s a process that requires a clear understanding of the components involved, careful preparation, and meticulous attention to detail. From identifying the power connectors on the motherboard to ensuring the correct and secure connection of power cables from the PSU, each step plays a vital role in the overall performance and stability of your system.
In the context of mining, the importance of correctly connecting power to motherboard is even more pronounced. Mining rigs often run at full capacity for extended periods, placing a significant amount of stress on the components. Any instability in the power supply could lead to system crashes, data loss, or hardware failure. Therefore, ensuring that the power is correctly and efficiently distributed across the motherboard is crucial for the smooth and profitable operation of a mining rig.
Throughout this guide, we’ve walked you through the basics of a motherboard, the preparation steps for connecting power, the process of identifying and connecting power connectors, and how to troubleshoot common issues. Whether you’re building a standard PC or a high-performance mining rig, these steps provide a solid foundation for correctly powering your motherboard.
However, remember that every PC build or mining setup is unique, and you may encounter challenges not covered in this guide. In such cases, don’t hesitate to seek help from online communities or professionals. PC building is a learning process, and there’s always more to learn.
In conclusion, correctly connecting power to motherboard is not just about getting your system to turn on; it’s about ensuring optimal performance, longevity, and stability of your system. It’s about powering up your PC building skills and taking a significant step towards becoming a confident and capable PC builder or miner. So, let’s power up and build on!
FAQs
What happens if power is not correctly connected to motherboard?
If power is not correctly connected to motherboard, your PC may not turn on, or it may not function optimally. Incorrect power connections can lead to system instability, component damage, or even electrical fires. In a mining rig, incorrect power connections can lead to system crashes, reduced mining efficiency, or hardware failure.
Can incorrect power connection damage the motherboard?
Yes, incorrect power connections can potentially damage the motherboard or other PC components. For example, forcing a power connector into a slot where it doesn’t belong can cause physical damage. Also, if the PSU provides more voltage than a component can handle, it can cause electrical damage.
Why does my mining rig shut down or restart during mining?
This could be due to insufficient power or overheating. Mining, especially cryptocurrency mining, is a power-intensive task. Make sure your PSU has enough wattage to support all your components, including multiple graphics cards. Also, check the cooling system of your rig and ensure all fans are working properly.
Why are some graphics cards not detected in my mining rig?
This could be due to power issues or incorrect installation. Each graphics card should have its own power connection from the PSU. Also, ensure the cards are correctly seated in their PCIe slots. If a card is still not detected, try it in a different slot or in another system to rule out a faulty card.
What should I do if my PC doesn’t power on?
First, check all power connections. Ensure the PSU is switched on and plugged into a power outlet. Also, make sure the power button on the case is correctly connected to the motherboard. If the PC still doesn’t power on, try a different power cable or outlet, and check the PSU if possible.
