Blocx is an exciting new cryptocurrency now available on Woolypooly, offering a unique opportunity for miners to participate in a decentralized ecosystem. With the Autolykos algorithm, Blocx is designed to be GPU-friendly, allowing miners to use their hardware to secure the network and earn rewards.
In this guide, we’ll take you through the step-by-step process of mining Blocx, from setting up your wallet to choosing the best pool for your region and configuring the appropriate mining software.
Table of Contents
Blocx Mining Algorithm – Autolykos
Blocx uses the Autolykos algorithm, known for its efficiency and ability to be mined using GPUs. This algorithm is ASIC-resistant, ensuring a more decentralized mining environment. Autolykos is similar to the algorithm used by other popular coins like Ergo, which also focuses on GPU mining.
Step 1: SetSet Up a Blocx Wallet or Use an Exchange Account
To receive your mining rewards, you have two options:
Direct Mining to an Exchange (without mandatory KYC)
Alternatively, you can mine directly to an exchange account, allowing you to trade or withdraw your earnings without having to transfer them later. Supported exchanges include:
- Mexc: Register here
- Coinex: Register here
Blocx Core Wallet
If you prefer to have full control of your funds, you can set up a Blocx wallet where your mining rewards will be sent. Download the official Blocx Core Wallet here:
- Blocx Core Wallet: Download here
Step 2: Choose a Mining Pool

Woolypooly offers a variety of mining pools tailored to different geographic regions to ensure optimal performance. Select the pool nearest to you:
- Auto Geo:
pool.woolypooly.com:3148 - Europe:
pool.eu.woolypooly.com:3148 - USA:
pool.us.woolypooly.com:3148 - Singapore:
pool.sg.woolypooly.com:3148 - Hong Kong:
pool.zh.woolypooly.com:3148 - Turkey:
pool.tr.woolypooly.com:3148 - Brazil:
pool.br.woolypooly.com:3148
For increased security, you can use the SSL ports (same 3148 port) for encrypted mining. And 3149 for SOLO mining.
Step 3: Download Mining Software
The recommended mining software depends on your GPU. Woolypooly suggests the following miners:
- Rigel (Nvidia): Download here
- SRBMiner (AMD): Download here
Make sure to download the correct version for your system (Windows or Linux).
Step 4: Configure Your Miner
Now, let’s configure your miner to start mining Blocx. Here are the configurations for each miner:
Rigel Miner (Nvidia)
Create a .bat file with the following content:
rigel.exe -a autolykos2 --coin blocx -o stratum+tcp://pool.woolypooly.com:3148 -u YOUR_BLOCX_WALLET_ADDRESS -p x
Replace YOUR_BLOCX_WALLET_ADDRESS with your Blocx wallet address.
SRBMiner (AMD)
Create a .bat file with the following content:
SRBMiner-MULTI.exe --algorithm autolykos2 --pool pool.woolypooly.com:3148 --wallet YOUR_BLOCX_WALLET_ADDRESS --disable-cpu
Again, replace YOUR_BLOCX_WALLET_ADDRESS with your actual Blocx wallet address.
Step 5: Start Mining
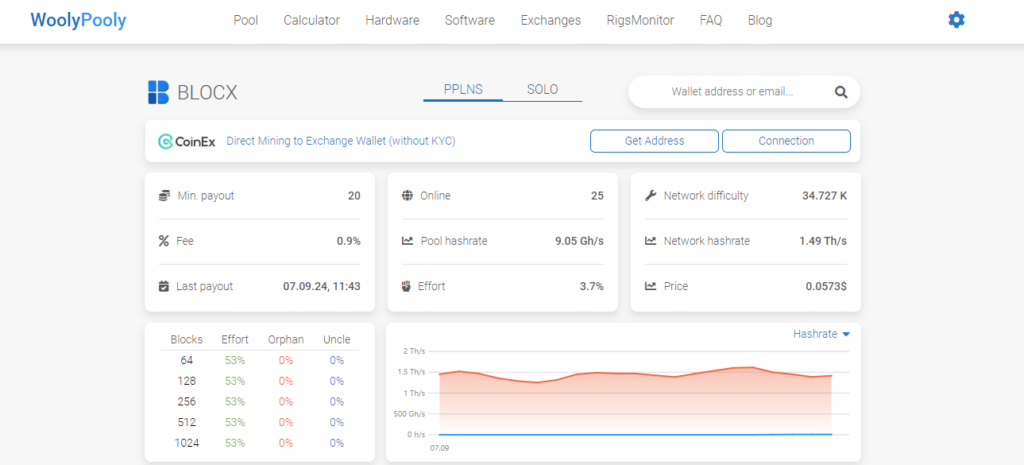
Once your configuration is ready, run the .bat file and your miner will start mining Blocx. You can monitor your performance and rewards directly on the Woolypooly dashboard.
Step 6: Withdraw and Exchange Blocx
If you are mining to the local wallet, after accumulating enough Blocx (minimum payout is 20 coins), you can withdraw your coins to one of the following exchanges to trade them:
- Mexc: Register here
- Coinex: Register here
Conclusion
Mining Blocx is a great way to get involved in this promising project while earning rewards. With the Autolykos algorithm, it’s accessible to a wide range of miners using both Nvidia and AMD GPUs. Follow the steps outlined in this guide, and you’ll be mining Blocx efficiently in no time.


